JS实现DOM操作(关于select标签的下拉省市联动)

一、DOM介绍

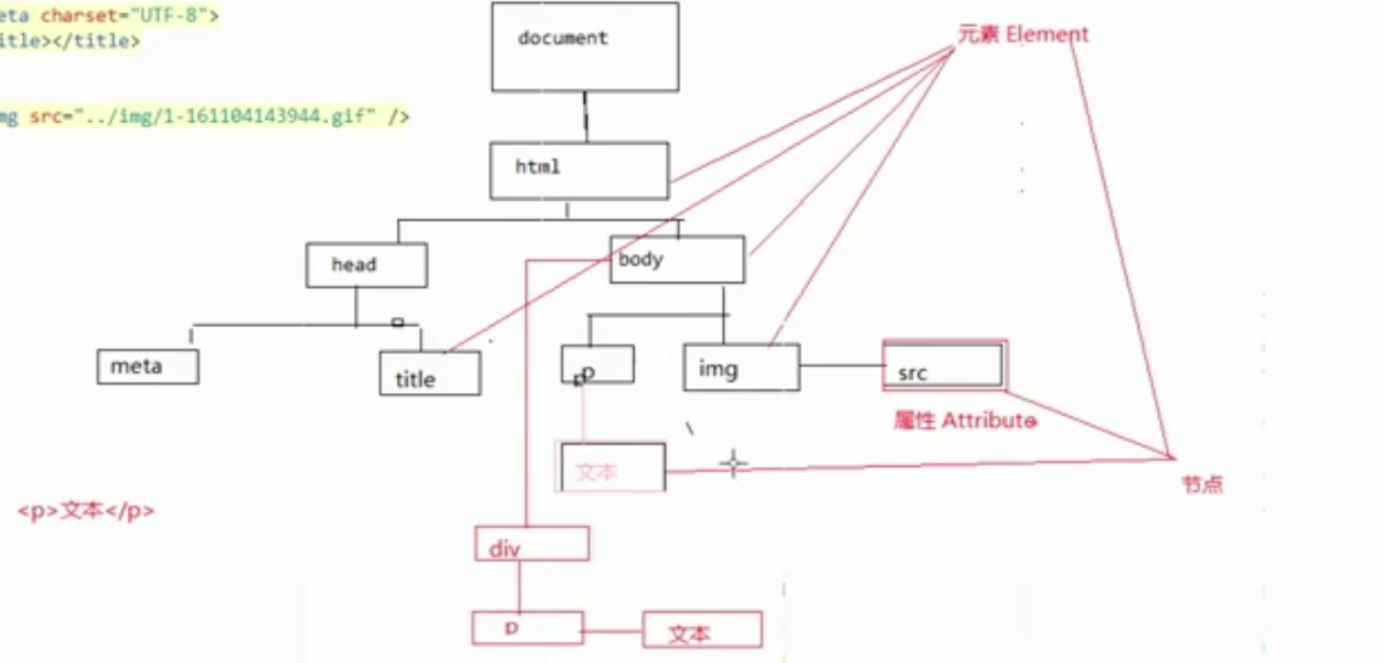
  • DOM(增删查改):DOcument Object Model–控制我们的文档(页面显示的部分)

    DOM节点细节展示:

  • DOM关于不断添加p标签的例子

    1.创建一个p标签—createElement(“p”);
    2.创建一个文本节点—document.createTextNode(“里面写要添加什么”);
    3.然后将两者连接起来—p.appendChild(textNode)
    4.将前两个连接的节点连接到div标签内—div.appendChild(p)

1
2
3
4
5
6
7
8
9
10
11
12
13
14
15
16
17
18
19
20
21
22
23
24
25
26
27

<!DOCTYPE html>
<html>
<head>
<meta charset="utf-8">
<title></title>
<script>
/*动态添加*/
function dianji()
{
var div=document.getElementById("div1"); //获取当前div标签

var p=document.createElement("p");//创建了一个 <P>节点
var textNode=document.createTextNode("文本内容"); //创建了一个 文本节点
p.appendChild(textNode);//将p和文本节点关联起来
div.appendChild(p);//将p添加到目标div中

}

</script>
</head>
<body>
<input type="button" value="点击" onclick="dianji()">
<!--动态的向div添加节点-->
<div id="div1"></div>
</body>
</html>

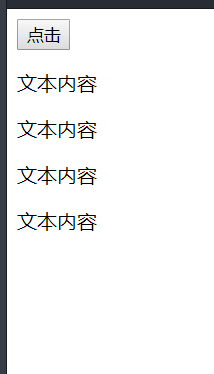
结果展示如下:


二、省市联动(主要使用DOM创建节点知识点)

省市联动:将select标签选择陕西省时候--后面的选择要弹出陕西省的市。

有个关键点(为了防止选完省之后清除掉能够选其他的省):

1
2
3
4
5
6
7
8
9
10
11
12
13
14
15
16
17
18
19
20
21
22
23
24
25
	//创建option节点
var option1=document.createElement("option");

//创建城市文本节点
var textNode=document.createTextNode(cityText);

//将两个节点关联起来
option1.appendChild(textNode);

//添加到城市的select中

var tian= document.getElementById("city"); //通过id把城市的select标签找到
tian.appendChild(option1); //把之前两个节点连接好的东西连接起来
tian.options.length=0; //每次选完省之后清空

```
- **总结:**


创建标签节点:createElement("标签名")
创建标签内文字节点:createTextNode(内容)
两个节点关联:标签节点.appendChild(文字节点)


**具体代码实现:**

JS实现页面表单表格

一、页面定时弹出广告(setInterval定时器和xxx.style.display属性)

1.1 技术分析

  • 定时器
    setInterval:每隔多少毫秒执行一次函数
    setTimeout:多少毫秒之后执行一次函数(只执行一次)
    clearInterval:清除
    clearTimeout:清除
1
2
3
4
5
6
7
8
9
10
11
12
13
14
15
16
17
18
19
20
21
22
23
24
25
26
27
28
29
30
31
32
33
<!DOCTYPE html>
<html>
<head>
<meta charset="utf-8">
<title></title>
<script>
//window对象是一个最顶层对象(setInterval之前的window.可以取消)

function test()
{
console.log("setInterval 调用了"); //输出 "setInterval 调用了"
}


var timeID;//用于存设置变量
function start()
{
timeID=setInterval("test()",2000); //隔2秒打开一次test()方法
}

function end()
{
clearInterval(timeID); //清除
}
</script>
</head>

<body>
<input type="button" value="开启定时器" onclick="start()"><br /> //定义两个触发事件按钮
<input type="button" value="关闭定时器" onclick="end()"><br />
</body>

</html>
  • 显示广告
    xxx.style.display="none";

  • 隐藏广告
    xxx.style.display="block";

1
2
3
4
5
6
7
8
9
10
11
12
13
14
15
16
17
18
19
20
21
22
23
24
25
26
<!DOCTYPE html>
<html>
<head>
<meta charset="utf-8">
<title></title>
<script>

//文档加载顺序:从上到下
function hideImg(){
var img=document.getElementById("img1");//1.先获取当按钮对象
img.style.display="none"; //2.display属性---无(×)
}

function showImg(){
var img=document.getElementById("img1");//1.先获取当按钮对象
img.style.display="block"; //2.display属性---有(√)
}

</script>
</head>
<body>
<input type="button" value="显示" onclick="showImg()">
<input type="button" value="隐藏" onclick="hideImg()"><br>
<img src="../img/1.jpg" id="img1" >
</body>
</html>

1.2 步骤分析

1. 确定事件:页面加载完成时间 onload触发
2. 时间要触发函数 init()
3. init函数里面做一件事情:
   3.1 启动定时器(setTimeout)
   3.2 显示一个广告
     3.2.1 在开启一个定时器五秒钟后取消广告
1
2
3
4
5
6
7
8
9
10
11
12
13
14
15
16
17
18
19
20
21
22
23
24
25
26
27
28
29
30
31
32
33

<!DOCTYPE html>
<html>
<head>
<meta charset="utf-8">
<title></title>
<script>
//三秒后显示广告
function show(){
var img=document.getElementById("div1");
img.style.display="block"; //display改为√
setTimeout("hide()",5000);// 放过一个定时器 选择一次性的setTimeout(函数,时间间隔)
}

//五秒后关闭广告
function hide(){
var img=document.getElementById("div1");
img.style.display="none"; //display改为×
}

//按钮触发的事件
function init(){
setTimeout("show()",3000);// 放过一个定时器 选择一次性的setTimeout(函数,时间间隔)
}

</script>
</head>

<body onload="init()">
<img id="div1" src="../products/hao/small02.jpg" width="100%" style="display: none;" >
</body>

</html>

JS实现轮播图

一、实现轮播图技术需求:

  1. 可以切换照片/图片
1
2
3
4
5
6
7
8
9
10
11
12
13
14
15
16
17
18
19
20
21
22

<!DOCTYPE html>
<html>
<head>
<meta charset="utf-8">
<title></title>
<script>
function changeImg()
{
var img=document.getElementById("img1"); //获取当前照片
img.src="../img/2.png";
}

</script>
</head>
<body>
<input type="button" value="切换图片" onclick="changeImg()">
<br>
<img src="../img/1.jpg" id="img1"> //给定一个id

</body>
</html>
  1. 定时切换(一定时间)
1
2
3
4
5
6
7
8
9
10
11
12
13
14
15
16
17
18
19
20
21
22
23
24
25
26
27
28
29
30
31
32
33
34
35
36

<!DOCTYPE html>
<html>
<head>
<meta charset="utf-8">
<title></title>
<script>
//window对象是一个最顶层对象(setInterval之前的window.可以取消)
function test()
{
console.log("setInterval 调用了");
}
//1.2秒执行后继续等2秒执行
//setInterval("test()",2000);
//2.2秒执行后不再执行
//setTimeout("test()",2000);

var timeID;
function start()
{
timeID=setInterval("test()",2000); //2秒执行一次test()
}

function end()
{
clearInterval(timeID); //停止
}


</script>
</head>
<body>
<input type="button" value="开启定时器" onclick="start()"><br />
<input type="button" value="关闭定时器" onclick="end()"><br />
</body>
</html>

二、步骤分析

1. 确定事件:文档加载完成的事件 onload
2. 事件要触发:init()
3. 函数内要做的事情:
    3.1 开启定时器:执行切换图片的函数:changeimg(获取要切换图片的要素)
1
2
3
4
5
6
7
8
9
10
11
12
13
14
15
16
17
18
19
20
21
22
23
24
25
26
27
28
29
30
31
<!DOCTYPE html>
<html>
<head>
<meta charset="utf-8">
<title></title>
<script>

var i=0;
function changeImg(){
var img=document.getElementById("img1"); //1.先获取当前对象

//2.计算出当前要切换到第几张图片
var c=i%3+1;

img.src="../img/"+c+".jpg"; //3.关键在于"c"获取当前哪个图片
i++; //结束后加1为了循环
}

function init(){ //init函数需要在1秒后实现changeImg函数
setInterval("changeImg()",1000);
}


</script>
</head>

<body onload="init()"> //body内onload事件直接出发init函数
<img src="../img/1.jpg" width="100%" id="img1"/> 目前放图片1 然后给名为img1为了获取方便

</body>
</html>

JS

一、JavaScript概述
  JavaScript是一种直译式脚本语言。(源码—>由浏览器解释执行)

  • JS的组成
    ECMAScript:核心部分 定义js的语法规范
    DOM:document Object Model 文档对象模型 主要是用来管理页面的

BOM:Browser Object Model 浏览器对象模型 主要是页面前后退 页面刷新 地址栏 历史记录 屏幕宽高

二、JS的语法

  1. 变量弱类型(var 代替一切类型使用)
  2. 区分大小写
  3. 语句之后的分号(可有可无)
  4. 写在script标签

三、JS的数据类型(内部自动转换)

  • 基本类型
    string number boolean undefined object
  • 引用类型
    对象,内置对象

四、运算符和语句

  1. 运算符和java一样
    其中的”===”必须是值和类型都必须相等
  2. 语句和java一样

五、JS的输出

  • alert()直接弹框
  • document.write()向页面输出
  • console.log()向控制台输出
  • innerHTML向页面输出(可以识别h5语言)
  • 获取页面元素:document.getElementByld(“id的名称”)

JS声明变量

1
var 变量名称=变量的值

JS声明函数

1
2
3
4
  var 函数名=function()
{

}
1
2
3
4
  function 函数名()
{

}

六、JS开发步骤
1. 指定事件
2. 事件—>函数(触发一个函数)
3. 函数里—>页面元素(操作)+交互动作

例1:做一个弹框—>点击—->显示“我被点击了”

1
2
3
4
5
6
7
8
9
10
11
12
13
14
15
16
17
18
19
20
21
22
23

<!DOCTYPE html>
<html>
<head>
<meta charset="utf-8">
<title></title>

<script>

function dianwo()
{
alert("我被点击了"); //dianwo函数里面做一个弹窗显示我被点击了
}

</script>

</head>
<body>

<input type="button" value="点我,弹框" onclick="dianwo()"> //做一个弹框 然后onclick到dianwo函数

</body>
</html>

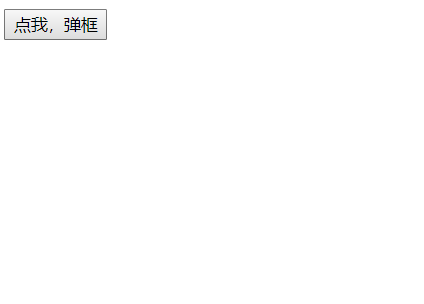
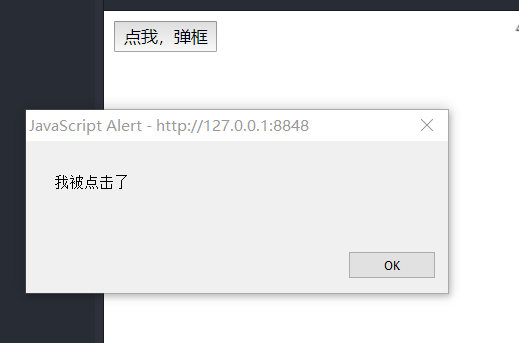
案例展示如下:

先是显示一个弹框:

点击弹框后弹出函数内容:


例2:替换文字

1
2
3
4
5
6
7
8
9
10
11
12
13
14
15
16
17
18
19
20
21
22
23
24

<!DOCTYPE html>
<html>
<head>
<meta charset="utf-8">
<title></title>
<script>

function dianwo()
{
var div =document.getElementById("name"); 使用document.getElementById("id的名字");
div.innerHTML="<font color='red'>内容被替换掉了</font>"; 使用innerHTML输出
}

</script>
</head>
<body>
<input type="button" value="点我修改div中内容" onclick="dianwo()">

<div id="name">
这里的内容一会就要被替换掉! //div是注明一个id为name的标签
</div>
</body>
</html>

打开浏览器右键选择“检查”-“Elements”-“Properties”

点击前:

点击后:


例3:注册时候检验所有信息

1
2
3
4
5
6
7
8
9
10
11
12
13
14
15
16
17
18
19
20
21
22
23
24
25
26
27
28
29
30
31
32
33
34
35
36
37
38
39
40
41
42
43
44
45
46
47
48
49
<!DOCTYPE html>
<html>
<head>
<meta charset="utf-8">
<title></title>
<script>
function checkForm()
{
//获取用户输入的内容
var input1=document.getElementById("username"); //给一个id获取输入的值
var chang1=input1.value; //获取当前值
if(chang1.length>=6)
{
//不改变布尔值是为了用户名正确要去验证邮箱正误
}
else
{
alert("用户名少于6位!");
return false;
}


//获取用户输入的邮箱
var input2=document.getElementById("email");
var chang2=input2.value;
if(/^[a-z0-9]+([._\\-]*[a-z0-9])*@([a-z0-9]+[-a-z0-9]*[a-z0-9]+.){1,63}[a-z0-9]+$/.test(chang2)) //邮箱的正则表达式使用test方法对比
{
alert("校验成功");
}
else
{
alert("校验失败");
return false;
}
return true;

}
</script>
</head>
<body>
<form action="../01-网站首页的优化/网站首页.html" onsubmit="return checkForm()">
<!--要用表单去提交-->
用户名:<input type="text" id="username"><br>
密码:<input type="password" id="password"><br>
邮箱:<input type="text" id="email"><br>
<input type="submit" value="提交" >
</form>
</body>
</html>

CSS网站注册案例

一、CSS盒子模型

  • 内边距:

padding-top   上
padding-right  右
padding-bottom 下
paddingleft   左

  • 外边距:

margin-top     上
margin-right    下
margin-bottom   左
margin-left    右

举例:

1
2
3
4
padding:10px           上下左右都是10px
padding:10px 20px         上下是10px 左右是20px
padding:10px 20px 30px      上是10px 右是20px 下是30px 左是20px(默认随右边)
padding:10px 20px 30px 40px   上是10px 右是20px 下是30px 左是40px
  • css绝对位置(div标签内)

positionabsolute
top 控制距离顶部的位置
left 控制距离左边的位置

1
2
3
4
5
6
7

<body>
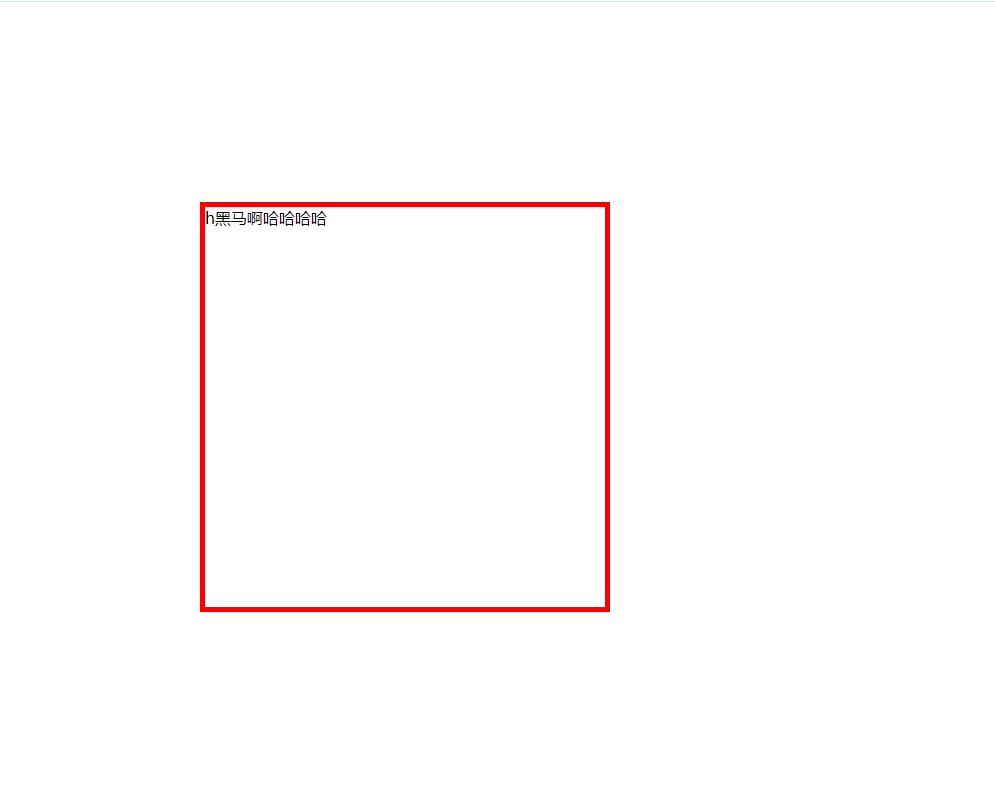
//可以让红色框距离顶部200px同时距离左边200px
<div style="border: 5px solid red;width: 400px;height: 400px;position: absolute;top: 200px;left: 200px;">
h黑马啊哈哈哈哈
</div>
</body>

实现结果如下:


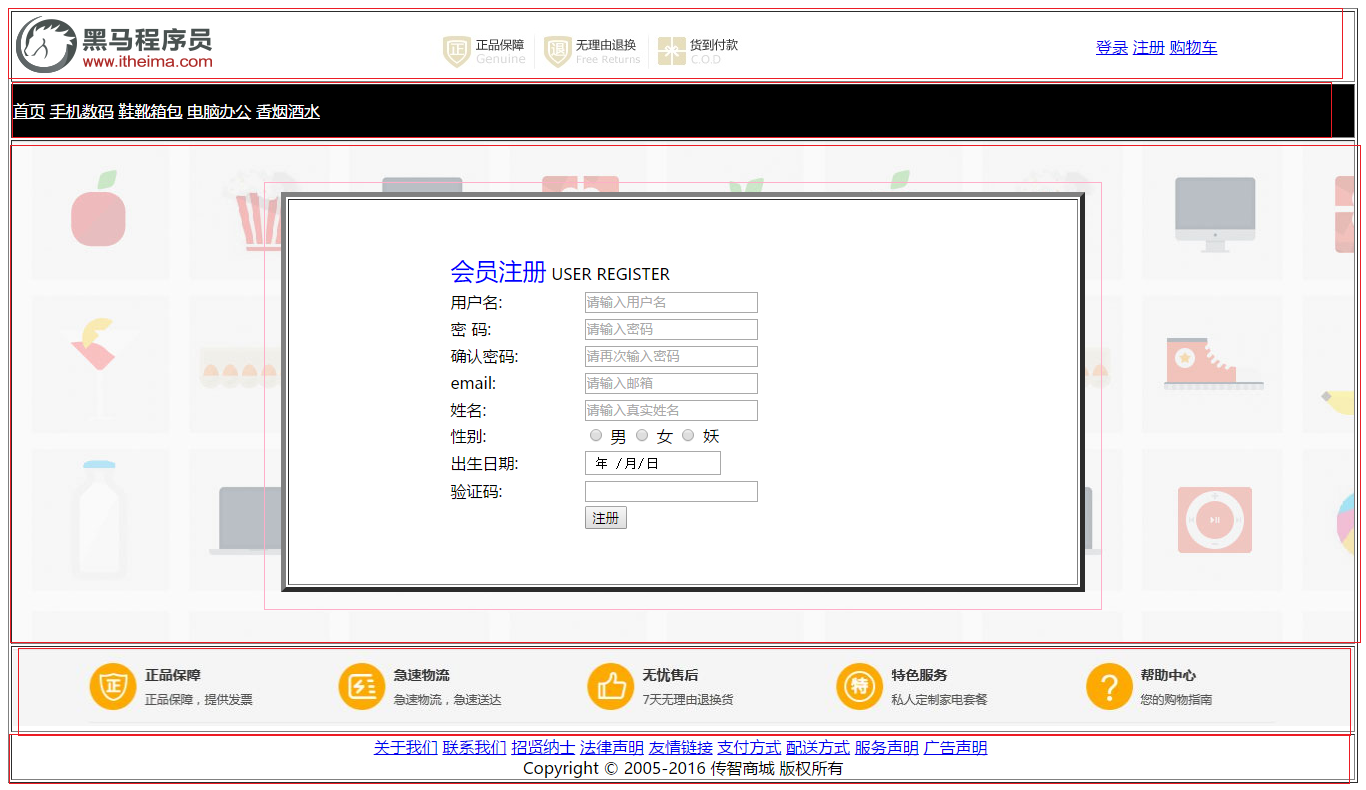
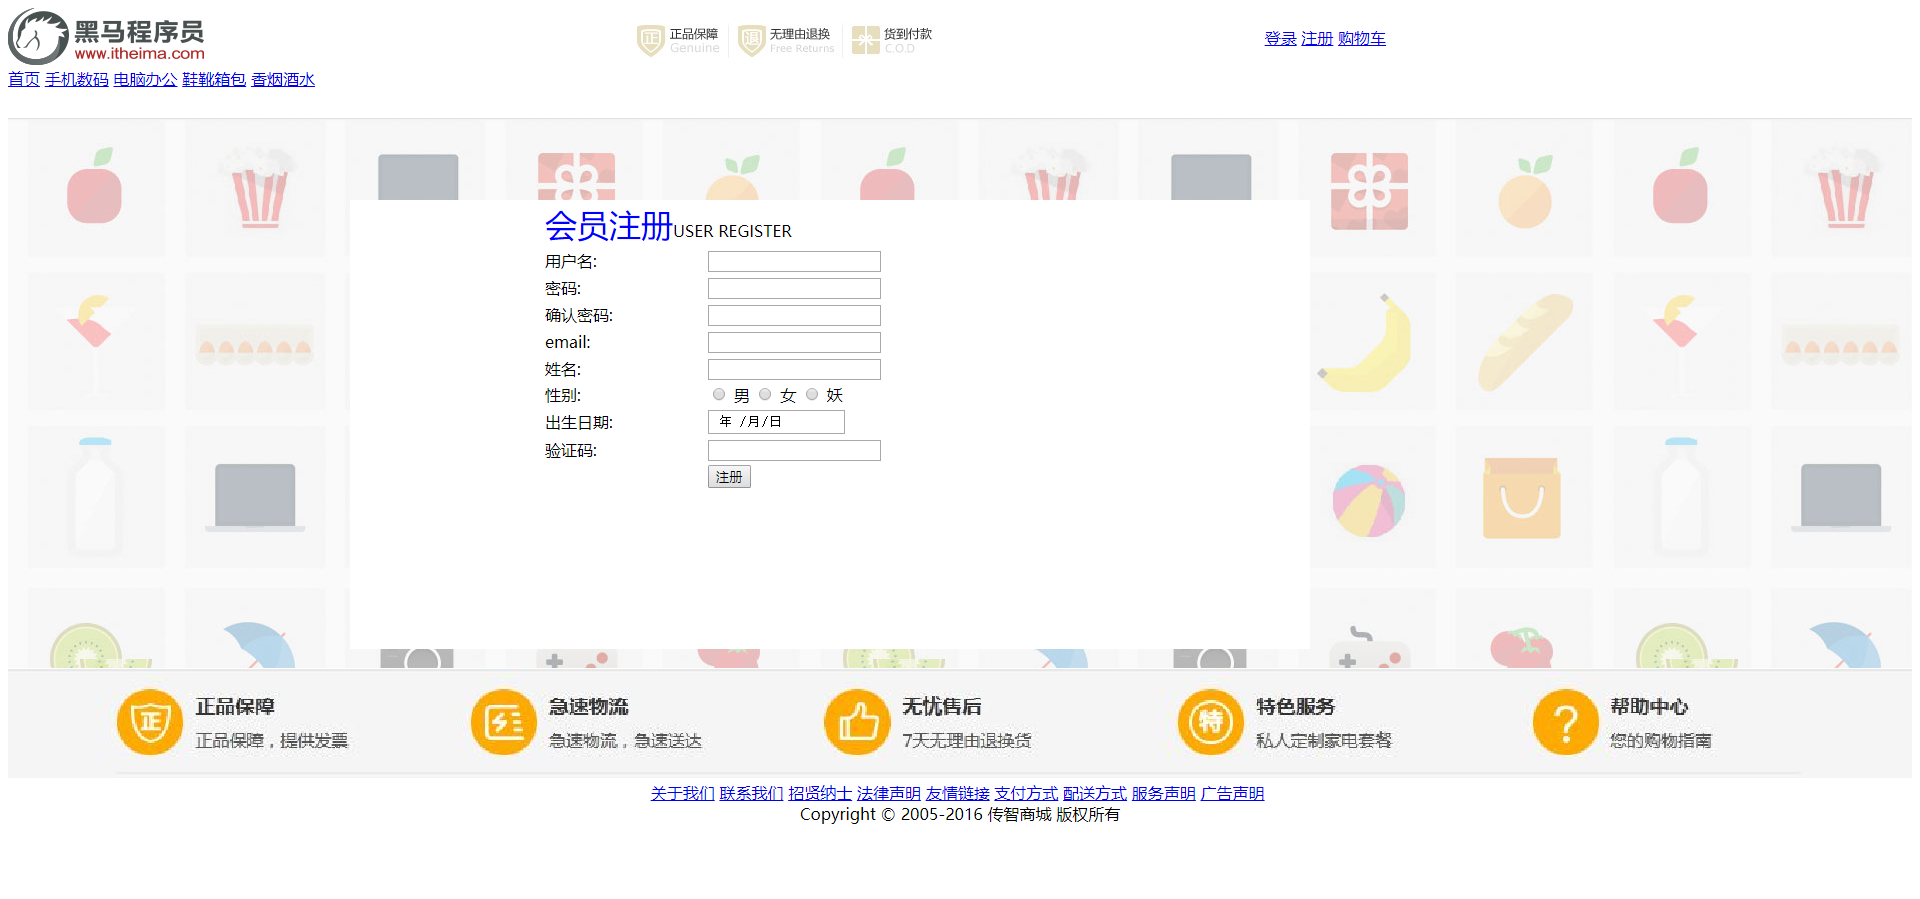
二、网站注册案例(使用CSS)

界面设计分析:

1. 第一部分是LOGO部分    用CSS类加载器
2. 第二部分是导航菜单        用div标签
3. 第三部分是注册部分        使用div套div再套一个table表格
4. 第四部分是FOOTER图片  用div标签
5. 第五部分是一堆超链接   用div标签

具体代码(对比H5只有第三部分更改较大):

1
2
3
4
5
6
7
8
9
10
11
12
13
14
15
16
17
18
19
20
21
22
23
24
25
26
27
28
29
30
31
32
33
34
35
36
37
38
39
40
41
42
43
44
45
46
47
48
49
50
51
52
53
54
55
56
57
58
59
60
61
62
63
64
65
66
67
68
69
70
71
72
73
74
75
76
77
78
79
80
81
82
83
84
85
86
87
88
89
90
91
92
93
94
95
96
97
98
99
100
101
102
103
104
105
106
107
108
109
110
111
112
113
114
115
116
117
118
119
120
<!DOCTYPE html>
<html>
<head>
<meta charset="utf-8">
<title></title>
<style>
.logo{
float: left;
width: 33%;

height: 60px;
line-height: 60px;
}

</style>
</head>
<body>
<!--1. 第一部分是LOGO部分-->
<div>
<div class="logo">
<img src="../img/logo2.png" />
</div>
<div class="logo">
<img src="../img/header.png" />
</div>
<div class="logo">
<a href="#">登录</a>
<a href="#">注册</a>
<a href="#">购物车</a>
</div>
</div>

<!--清除浮动-->
<div style="clear: both;"></div>

<!--2. 第二部分是导航菜单-->
<div style="color: #000000;height: 50px;">
<a href="#" class="amenu">首页</a>
<a href="#" class="amenu">手机数码</a>
<a href="#" class="amenu">电脑办公</a>
<a href="#" class="amenu">鞋靴箱包</a>
<a href="#" class="amenu">香烟酒水</a>
</div>

<!--3. 第三部分是注册部分-->
<div style="background: url(../image/regist_bg.jpg);height: 550px;"> //主要是背景加一个图片 高设置为整个div的高度
<div style="position:absolute;top:200px;left:350px;border: 5px solid darkgtay;width: 50%;height: 50%;background-color: white;"> //里面的div为那个白色框框 使用绝对位置距离顶部200px,左边350px ,边框为5px,高和宽都是最大的部分的一半,背景色为白色
<table width="60%" align="center"> //用于展示注册的信息
<tr>
<td colspan="2"><font color="blue" size="6">会员注册</font>USER REGISTER</td>

</tr>
<tr>
<td>用户名:</td>
<td><input type="text"/></td>
</tr>
<tr>
<td>密码:</td>
<td><input type="password"/></td>
</tr>
<tr>
<td>确认密码:</td>
<td><input type="password"/></td>
</tr>
<tr>
<td>email:</td>
<td><input type="email"/></td>
</tr>
<tr>
<td>姓名:</td>
<td><input type="text"/></td>
</tr>
<tr>
<td>性别:</td>
<td><input type="radio" name="sex"/> 男
<input type="radio" name="sex"/> 女
<input type="radio" name="sex"/> 妖
</td>
</tr>
<tr>
<td>出生日期:</td>
<td><input type="date"/></td>
</tr>
<tr>
<td>验证码:</td>
<td><input type="text"/></td>
</tr>
<tr>
<td></td>
<td><input type="submit" value="注册"/></td>
</tr>
</table>
</div>


</div>

<!--4. 第四部分是FOOTER图片-->
<div>
<img src="../img/footer.jpg" width="100%"/>
</div>

<!--5. 第五部分: 放一堆超链接-->
<div style="text-align: center;">

<a href="#">关于我们</a>
<a href="#">联系我们</a>
<a href="#">招贤纳士</a>
<a href="#">法律声明</a>
<a href="#">友情链接</a>
<a href="#">支付方式</a>
<a href="#">配送方式</a>
<a href="#">服务声明</a>
<a href="#">广告声明</a>
<br />
Copyright © 2005-2016 传智商城 版权所有
</div>

</body>
</html>

页面结果如下:


CSS+div实现网站首页优化

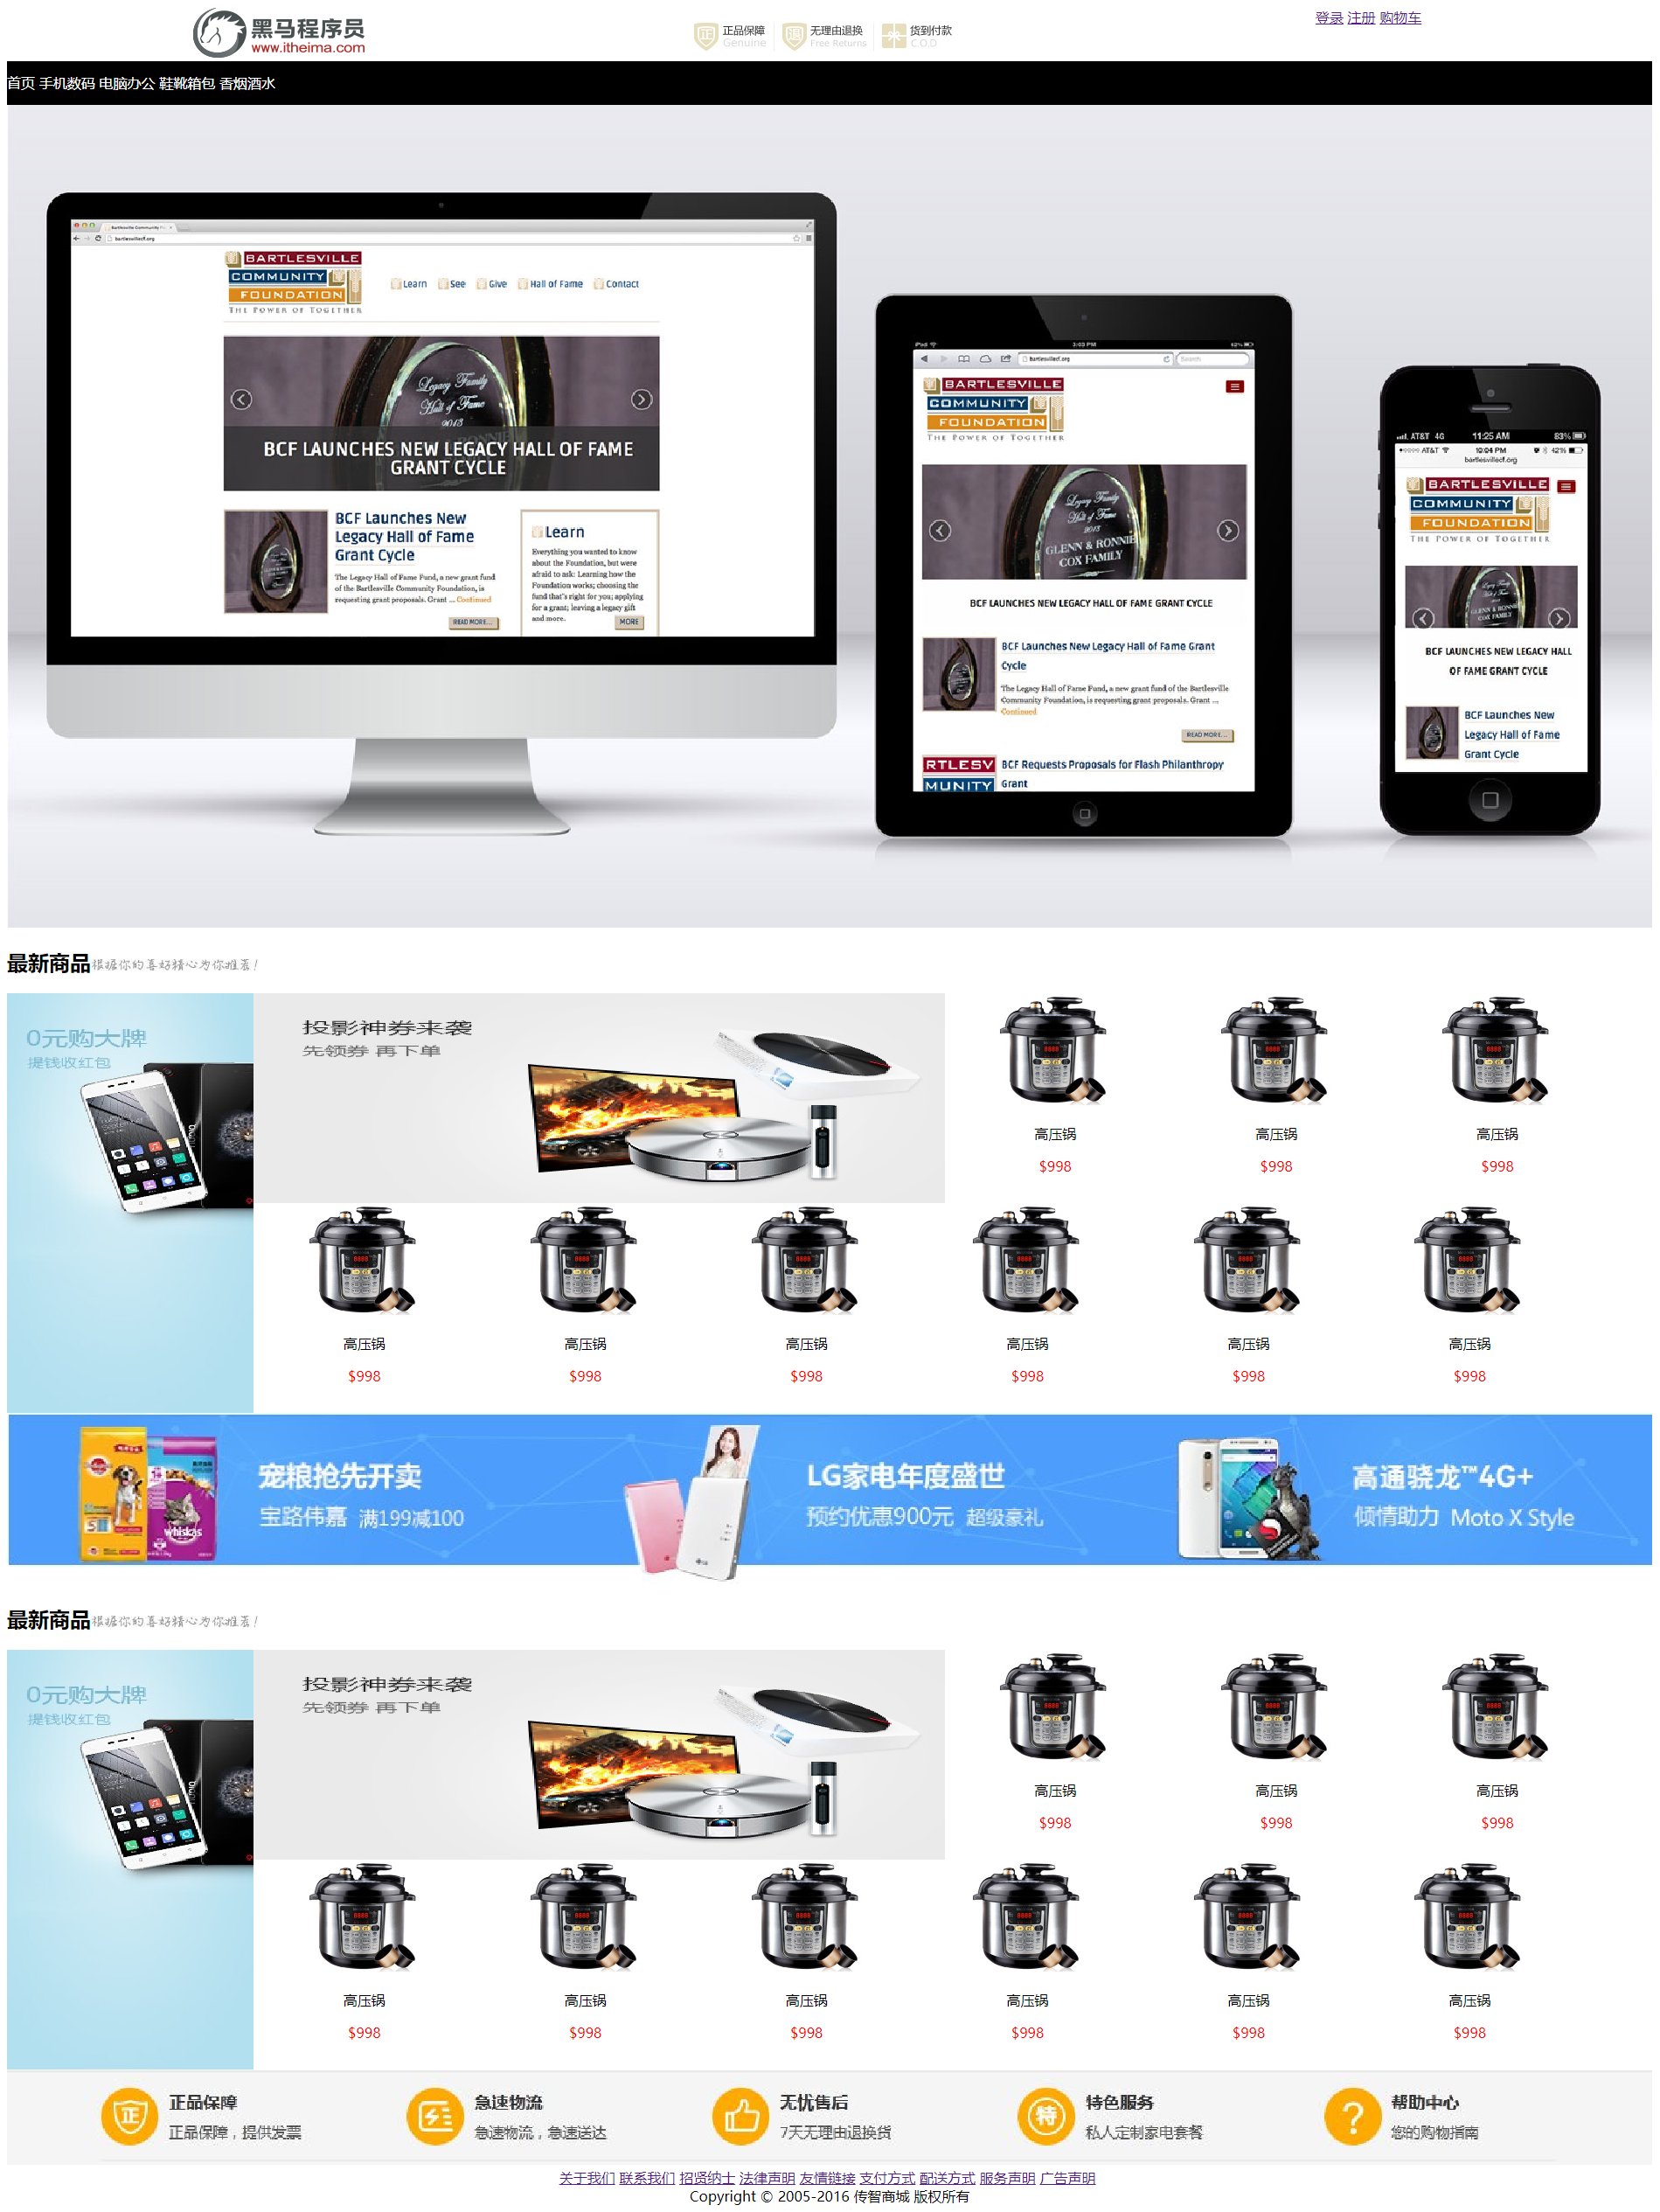
  对于上次H5写的网站首页进行优化。主要是给共同变化项目给css类加载器优化并且使用css浮动和div标签配套使用。

分析如下:

1. 创一个最外层div
2. 第一部份: LOGO部分: 嵌套三个div
3. 第二部分: 导航栏部分 : 放置5个超链接
4. 第三部分: 轮播图 
5. 第四部分: 主要是div标签里面要更改浮动加了css类加载器
6. 第五部分: 直接放一张图片
7. 第六部分: 抄第四部分的
8. 第七部分: 放置一张图片
9. 第八部分: 放一堆超链接

《我以//xxx为辅助解释,相当于前端的

1
2
3
4
5
6
7
8
9
10
11
12
13
14
15
16
17
18
19
20
21
22
23
24
25
26
27
28
29
30
31
32
33
34
35
36
37
38
39
40
41
42
43
44
45
46
47
48
49
50
51
52
53
54
55
56
57
58
59
60
61
62
63
64
65
66
67
68
69
70
71
72
73
74
75
76
77
78
79
80
81
82
83
84
85
86
87
88
89
90
91
92
93
94
95
96
97
98
99
100
101
102
103
104
105
106
107
108
109
110
111
112
113
114
115
116
117
118
119
120
121
122
123
124
125
126
127
128
129
130
131
132
133
134
135
136
137
138
139
140
141
142
143
144
145
146
147
148
149
150
151
152
153
154
155
156
157
158
159
160
161
162
163
164
165
166
167
168
169
170
171
172
173
174
175
176
177
178
179
180
181
182
183
184
185
186
187
188
189
190
191
192
193
194
195
196
197
198
199
200
201
202
203
204
205
206
207
208
209
210
211
212
213
214
215
216
217
218
219
220
221
222
223
224
225
226
227
228

<!DOCTYPE html>
<html>
<head>
<meta charset="utf-8">
<title></title>

<style> //css必备

//用在第一个logo部分
.logo{
float:left;
width:33%; //让三个各占33%的大小
border-width: 1px;
border-style: solid;
border-color: white; //边框是白色
height: 60px; //高为60(px为单位)
}

//用于第二个五个超链接部分
.amenu{
color: white;
text-decoration: none;
height: 50px;
line-height: 50px;
}

//用于最复杂的高压锅部分
.product{
float: left;
text-align: center;
width: 16%;
height: 240px; //最左边图片div为480px(要有两行)
}

</style>

</head>

<body>
<div>
<!--2. 第一部份: LOGO部分: 嵌套三个div-->
<div style="text-align: -webkit-center;">
<div class="logo"><img src="../img/logo2.png"/></div>
<div class="logo"><img src="../img/header.png"/></div>
<div class="logo" >
<a href="#">登录</a>
<a href="#">注册</a>
<a href="#">购物车</a>
</div>
</div>

<!--清除浮动(上下影响)-->
<div style="clear:both;"></div>

<!--3. 第二部分: 导航栏部分 : 放置5个超链接-->
<div style="background-color: black;"> //背景黑色
<a href="#" class="amenu">首页</a> //用类加载器设置白色和高宽等属性
<a href="#" class="amenu">手机数码</a>
<a href="#" class="amenu">电脑办公</a>
<a href="#" class="amenu">鞋靴箱包</a>
<a href="#" class="amenu">香烟酒水</a>
</div>

<!--4. 第三部分: 轮播图-->
<div>
<img src="../img/1.jpg" width="100%"/>
</div>

<!--5. 第四部分:-->
<div>
<div><h2>最新商品<img src="../img/title2.jpg"/></h2></div> //先设置好第一部分的最新商品栏

<!--左侧广告图-->
<div style="width: 15%; height: 480px; float: left;">
<img src="../products/hao/big01.jpg" width="100%" height="100%"/>
</div>
<!--
右侧商品
-->
<div style="width: 84%; height: 480px;float: left;">
<div style="height: 240px; width: 50%; float: left;">
<img src="../products/hao/middle01.jpg" height="100%" width="100%" />
</div>
<div class="product"> //都使用类加载器设置共同属性
<img src="../products/hao/small08.jpg" />
<p>高压锅</p>
<p style="color: red;">$998</p>
</div>
<div class="product">
<img src="../products/hao/small08.jpg" />
<p>高压锅</p>
<p style="color: red;">$998</p>
</div>
<div class="product">
<img src="../products/hao/small08.jpg" />
<p>高压锅</p>
<p style="color: red;">$998</p>
</div>
<div class="product">
<img src="../products/hao/small08.jpg" />
<p>高压锅</p>
<p style="color: red;">$998</p>
</div>
<div class="product">
<img src="../products/hao/small08.jpg" />
<p>高压锅</p>
<p style="color: red;">$998</p>
</div>
<div class="product">
<img src="../products/hao/small08.jpg" />
<p>高压锅</p>
<p style="color: red;">$998</p>
</div>
<div class="product">
<img src="../products/hao/small08.jpg" />
<p>高压锅</p>
<p style="color: red;">$998</p>
</div>
<div class="product">
<img src="../products/hao/small08.jpg" />
<p>高压锅</p>
<p style="color: red;">$998</p>
</div>
<div class="product">
<img src="../products/hao/small08.jpg" />
<p>高压锅</p>
<p style="color: red;">$998</p>
</div>

</div>
</div>


<!--6. 第五部分: 直接放一张图片-->
<div>
<img src="../products/hao/ad.jpg" width="100%"/> //保持在一行100%
</div>

<!--7. 第六部分: 抄第四部分的-->
<div>
<!--5. 第四部分:-->
<div>
<div><h2>最新商品<img src="../img/title2.jpg"/></h2></div>

<!--左侧广告图-->
<div style="width: 15%; height: 480px; float: left;">
<img src="../products/hao/big01.jpg" width="100%" height="100%"/>
</div>
<!--
右侧商品
-->
<div style="width: 84%; height: 480px;float: left;">
<div style="height: 240px; width: 50%; float: left;">
<img src="../products/hao/middle01.jpg" height="100%" width="100%" />
</div>
<div class="product">
<img src="../products/hao/small08.jpg" />
<p>高压锅</p>
<p style="color: red;">$998</p>
</div>
<div class="product">
<img src="../products/hao/small08.jpg" />
<p>高压锅</p>
<p style="color: red;">$998</p>
</div>
<div class="product">
<img src="../products/hao/small08.jpg" />
<p>高压锅</p>
<p style="color: red;">$998</p>
</div>
<div class="product">
<img src="../products/hao/small08.jpg" />
<p>高压锅</p>
<p style="color: red;">$998</p>
</div>
<div class="product">
<img src="../products/hao/small08.jpg" />
<p>高压锅</p>
<p style="color: red;">$998</p>
</div>
<div class="product">
<img src="../products/hao/small08.jpg" />
<p>高压锅</p>
<p style="color: red;">$998</p>
</div>
<div class="product">
<img src="../products/hao/small08.jpg" />
<p>高压锅</p>
<p style="color: red;">$998</p>
</div>
<div class="product">
<img src="../products/hao/small08.jpg" />
<p>高压锅</p>
<p style="color: red;">$998</p>
</div>
<div class="product">
<img src="../products/hao/small08.jpg" />
<p>高压锅</p>
<p style="color: red;">$998</p>
</div>
</div>
</div>
</div>

<!--8. 第七部分: 放置一张图片-->
<div>
<img src="../img/footer.jpg" width="100%"/>
</div>

<!--9. 第八部分: 放一堆超链接-->
<div style="text-align: center;"> //居中

<a href="#">关于我们</a>
<a href="#">联系我们</a>
<a href="#">招贤纳士</a>
<a href="#">法律声明</a>
<a href="#">友情链接</a>
<a href="#">支付方式</a>
<a href="#">配送方式</a>
<a href="#">服务声明</a>
<a href="#">广告声明</a>
<br/>
Copyright © 2005-2016 传智商城 版权所有
</div>
</div>
</body>
</html>

成果展示如下:


CSS和DIV

一、CSS
Cascading Style Sheets层叠样式表

块标签(div span)

div(自带换行)
span

1
2
3
4
5

<body>
<span>张安</span> //在一行
<span>啊哈哈 </span>
</body>
1
2
3
4
5

<body>
<div>张三</div> //自动换行 所以在两行
<div>李四</div>
</body>

二、CSS选择器入门(只显示head和body内容)

1.元素选择器 标签元素名{}  <div>XXX</div>
2.id选择器  #id名称{}  <div id="名字">XXX</div>
3.类选择器  .类名{}  <div class="名字">XXX</div>
4.属性选择器 a[href][title=’title名字’]  <div title="名字">XXX</div> 
5.后代选择器(层) h1 em{}  将h1下面的em标签改变
6.子元素选择器 h1>em{}
7.伪类选择器 改变点击前后的颜色变化

  • 元素选择器(改一个标签的)
1
2
3
4
5
元素名称{
属性名称:值
属性名称:值
属性名称:值
}
1
2
3
4
5
6
7
8
9
10
11
12
13
14
15
16
17
18

<head>
<meta charset="utf-8">
<title></title>
<style>
span //把span标签的都改为红色
{
color:red;
}
</style>

</head>

<body>
<span>这是一个元素选择器</span>
</body>

结果如下:


  • ID选择器(改一个id的)
1
2
3
4
5
以#开头
#ID的名称{
属性名称:值
属性名称:值
}
1
2
3
4
5
6
7
8
9
10
11
12
13
14
15
16
17
18
19
20
21
	<head>
<meta charset="utf-8">
<title></title>

<style>
#div1{
color: red; //把id=div的改为红色
}
</style>

</head>

<body>

<div id="div1">大一</div> //给第一行一个id名字 必须唯一!!!!!!!!!1
<div>大二</div>
<div>大三</div>
<div>大四</div>

</body>
</html>

结果如下:


  • 类选择器(改一类的)
1
2
3
4
5
以.开头
.类的名字{
属性名称:值
属性名称:值
}
1
2
3
4
5
6
7
8
9
10
11
12
13
14
15
16
17
18
19
20
21
22
23
24
<head>
<meta charset="utf-8">
<title></title>

<style>
.da{ //把da这个类的都改成红色
color:red;
}

.gao{ //把gao这个类的都改成红色
color: blue;
}
</style>

</head>

<body>

<div class="da">大一</div>
<div class="da">大二</div>
<div class="gao">高一</div>
<div class="gao">高二</div>

</body>

结果如下:


三、CSS引入方式

1.外部样式  通过link标签引入一个外部css文件
2.内部样式(选择器使用)  head里面加style标签内编写
3.行内样式  直接在body标签行加一个style标签 

优先级(具有就近原则):行内样式 >ID选择器 > 类选择器 >元素选择器

  • 外部样式举例:

style1.class文件内容(只写style标签里的内容)

1
2
3
4
5
6
7
8

.da{
color:red;
}

.gao{
color: yellow;
}

外部样式.html文件内容(只写style标签里的内容)

1
2
3
4
5
6
7
8
9
10
11
12
13
14
15
16
17
18
19

<head>
<meta charset="utf-8">
<title></title>

//只需要用link标签将其标记到style1.css文件内(也不需要style标签)
<link rel="stylesheet" type="text/css" href="style.css"/>

</head>

<body>

<div class="da">大一</div> //分类
<div class="da">大二</div>
<div class="gao">高一</div>
<div class="gao">高二</div>
<div class="gao">高三</div>

</body>

行内样式:

1
2
3
4
5
6
7
8
9
10
11
12
13
14
15
<!DOCTYPE html>
<html>
<head>
<meta charset="utf-8">
<title></title>

</head>
<body>
<div style="color:navajowhite">大一</div> //这一行更改style标签
<div >大二</div>
<div >大三</div>
<div >高一</div>
<div >高二</div>
</body>
</html>

结果如下:


网站后台案例

一、框架标签(frameset)

frameset(使用时代替了body,因此需要删除body标签)

  1.frame: 加src属性添加其他h5文件
  2.cols/rows:确定是行/列占比

在使用前需要写出aaa/bbb/ccc三个h5文件

此为aaa.html文件内容(只含body内代码):

1
2
3
<body bgcolor="#1859A5">
123
</body>

此为bbb.html文件内容(只含body内代码):

1
2
3
4
5
<body bgcolor="red">
<a href="data.html" target="rigthFrame">收件箱 //意思就是收件箱连接着data.html然后结果输出到名字为rigthFrame的地址
<a href="#">发送箱
<a href="#">已读
</body>

此为ccc.html文件内容(只含body内代码)::

1
2
3
<body bgcolor="yellow">
789
</body>

此为data.html文件内容(只含body内代码):

1
2
3
<body>
这里面要放置后面的数据
</body>

此为模拟qq邮箱界面

1
2
3
4
5
6
7
8
9
10
11
12
13
14
15
16
	<!--frameset 框架标签
1.frame: 加src属性添加其他h5文件
2.cols/rows:确定是行/列占比
-->

<frameset rows="15%,*,"> //将框架分为上下两行
<frame src="aaa.html">

<frameset cols="15%,*"> //将第一次分的下面分为两列
<frame src="bbb.html">
<frame src="ccc.html" name="rigthFrame"> //将ccc.html命名为rigthFrame 方便其他链接找到

</frameset>


</html>

主页界面

选择收件箱之后-输出的东西输出到ccc.html的区域:


网站注册案例

一、举例学习注册页面所需的标签(只展示body内部代码)

form表单标签 最终将整个表单提交

  1.action:提交的地址(之后跳转的地方)
  2.method:
    get:(默认提交方式) 参数拼接在链接之后 有大小限制(4k)
    post: 参数封装在请求体中 没有大小限制

input输入框标签 选择各种样式输入选择

  1.type:指定输入样式(单选/多选/输入)
    text : 文本
    password : 密码框
    radio : 单选按钮(可以使用name=”sex” 放入同一个类 从而单选)
    checkbox : 复选框
    file : 上传文件
    img:图片
    submit : 提交按钮
    button : 普通按钮
    reset : 重置按钮
    hidden : 隐藏域
    date(datetime/datetime-local) : 日期类型
    tel : 手机号
    number : 只允许输入数字

  2.name:(表单提交时)参数名称
  3.id:输入项取一个名字(后期好找)
  4.placeholder:再输入前放置一个提示句

textarea文本域 : 输入一段文字

  1.cols : 指定宽度
  2.rows : 指定的是高度

select下拉选择: 下拉可以选择(籍贯)

  1.option:写有关信息


具体实现代码:

1
2
3
4
5
6
7
8
9
10
11
12
13
14
15
16
17
18
19
20
21
22
23
24
25
26
27
28
29
30
31
32
33
34
35
36
37
38
39
40
41
42
43
44
45
46
47
48
49
50

<!--表单标签 form
1.action:提交的地址(之后跳转的地方)
2.method:
get:(默认提交方式) 参数拼接在链接之后 有大小限制(4k)
post: 参数封装在请求体中 没有大小限制
-->


<!-- input
1.type:指定输入样式(单选/多选/输入)
2.name:(表单提交时)参数名称
3.id:输入项取一个名字(后期好找)
4placeholder:再输入前放置一个提示句
-->

<!-- textarea(文本框)
cols:行
rows:列
-->
<!-- select(选择)
option
-->

<form action="../04-网页首页/网站首页.html" method="get">
<input TYPE="hidden" value="asdasdasdasd">
用户名:<input type="text" placeholder="请输入用户名"/><br>
密码:<input type="password"/><br>
确认密码:<input type="password"/><br>
邮箱: <input type="text" /> <br >
手机号码: <input type="tel" /> <br >
照片:<input type="file"/><br>
性别:<input type="radio" name="sex"/>男<input type="radio" name="sex"/>女<br>
爱好:<input type="checkbox">抽烟
<input type="checkbox">喝酒
<input type="checkbox">烫头
<input type="checkbox">写代码<br>
择偶要求:<textarea cols="40" rows="4"></textarea><br>
籍贯:<select>
<option>--请选择--</option>
<option>西安</option>
<option>武汉</option>
<option>北京</option>
</select><br>
验证码:<input type="text"><br>
出生日期:<input type="date"><br>
<input type="submit" value="注册">
<input type="button" value="普通按钮">
<input type="reset" value="重置按钮"><br>
</form>

结果展示:


二、网站注册分析
创建一个5行一列的表格
1. logo部分 一行三列的表格放两个图片和三个假的#便签
2. 导航栏 五个假的#标签
3. 注册部分 分为10*2的表格然后使用到表格合并 添加一些input标签和图片文字
4. 页脚图片 加图片
5. 网站声明信息 七八个假的#标签

分析界面:


三、具体实现代码(只写body部分代码)

1
2
3
4
5
6
7
8
9
10
11
12
13
14
15
16
17
18
19
20
21
22
23
24
25
26
27
28
29
30
31
32
33
34
35
36
37
38
39
40
41
42
43
44
45
46
47
48
49
50
51
52
53
54
55
56
57
58
59
60
61
62
63
64
65
66
67
68
69
70
71
72
73
74
75
76
77
78
79
80
81
82
83
84
85
86
87
88
89
90
91
92
93
94
95
96
97
98
99
100
101
102
103
104
105
106
107
108
109
110
111
112
113
114
115
116
117
118
119
120
121
122
123
124
125
126
127
128
129
130
131
132
133
134
135
136
137
138
139
140
141
142
143
<!DOCTYPE html>
<html>
<head>
<meta charset="utf-8">
<title></title>
</head>
<body>
<table border="" width="100%">
<!-- 1. logo部分-->
<tr>
<td>
<table border="" width="100%">
<tr>
<td><img src="../img/logo2.png"></td>
<td><img src="../img/header.png"></td>
<td>
<a href="#">登录</a>
<a href="#">注册</a>
<a href="#">购物车</a>
</td>
</tr>
</table>
</td>
</tr>

<!--2. 导航栏-->
<tr bgcolor="black">
<td>
<a href="#"><font color="white">首页</font></a>
<a href="#"><font color="white">手机数码</font></a>
<a href="#"><font color="white">电脑办公</font></a>
<a href="#"><font color="white">手提箱包</font></a>
<a href="#"><font color="white">家电</font></a>
</td>
</tr>

<!--3. 注册部分-->
<tr >
<td background="../image/regist_bg.jpg" height="1000px"> <!--增加一个背景-->

<table border="5px" width="60%" height="80%" bgcolor="white" align="center">
<tr>
<td>
<form action="注册入门案例.html">
<table width="60%" height="80%" align="center">
<tr>
<td colspan="2"><font color="blue" size="8">会员注册</font> USER REGISTER</td>
</tr>
<tr size="6">
<td size="6">用户名:</td>
<td>
<input type="text" placeholder="请输入用户名"/>
</td>
</tr>
<tr>
<td>密 码:</td>
<td>
<input type="password" placeholder="请输入密码"/>
</td>
</tr>
<tr>
<td>确认密码:</td>
<td>
<input type="password" placeholder="请再次输入密码"/>
</td>
</tr>
<tr>
<td>email:</td>
<td>
<input type="text" placeholder="请输入邮箱"/>
</td>
</tr>
<tr>
<td>姓名:</td>
<td>
<input type="text" placeholder="请输入真实姓名"/>
</td>
</tr>
<tr>
<td>性别:</td>
<td>
<input type="radio" name="sex" /> 男
<input type="radio" name="sex" /> 女
<input type="radio" name="sex" /> 妖
</td>
</tr>
<tr>
<td>出生日期:</td>
<td>
<input type="date" />
</td>
</tr>
<tr>
<td>验证码:</td>
<td>
<input type="text" />
</td>
</tr>
<tr>
<td></td>
<td>
<input type="submit" value="注册" />
</td>
</tr>
</table>
</form>

</td>
</tr>
</table>


</td>
</tr>

<!--4. 页脚图片-->
<tr>
<td>
<img src="../image/footer.jpg" width="100%" />
</td>
</tr>

<!--5. 网站声明信息-->
<tr>
<td align="center">
<a href="#">关于我们</a>
<a href="#">联系我们</a>
<a href="#">招贤纳士</a>
<a href="#">法律声明</a>
<a href="#">友情链接</a>
<a href="#">支付方式</a>
<a href="#">配送方式</a>
<a href="#">服务声明</a>
<a href="#">广告声明</a>
<br />
Copyright © 2005-2016 购物商城 版权所有
</td>
</tr>

</table>
</body>
</html>

实现页面如下:


HTML网站首页案例

一、分析设计
  将首页分为一个8*1的表格

1.第一部分:LOGO部分嵌套一个1*3的表格

2.第二部分:导航栏部分 放置5个超链接

3.第三部分:轮播图 放置图片

4.第四部分: 展示产品嵌套一个3*7的表格

5.第五部分:广告位置放置图片

6.第六部分:展示产品嵌套一个3*7的表格

7.第七部分:广告位置放置图片

8.第八部分:最低端放置超链接

分析图


二、详细设计

1
2
3
4
5
6
7
8
9
10
11
12
13
14
15
16
17
18
19
20
21
22
23
24
25
26
27
28
29
30
31
32
33
34
35
36
37
38
39
40
41
42
43
44
45
46
47
48
49
50
51
52
53
54
55
56
57
58
59
60
61
62
63
64
65
66
67
68
69
70
71
72
73
74
75
76
77
78
79
80
81
82
83
84
85
86
87
88
89
90
91
92
93
94
95
96
97
98
99
100
101
102
103
104
105
106
107
108
109
110
111
112
113
114
115
116
117
118
119
120
121
122
123
124
125
126
127
128
129
130
131
132
133
134
135
136
137
138
139
140
141
142
143
144
145
146
147
148
149
150
151
152
153
154
155
156
157
158
159
160
161
162
163
164
165
166
167
168
169
170
171
172
173
174
175
176
177
178
179
180
181
182
183
184
185
186
187
188
189
190
191
192
193
194
195
196
197
198
199
200
201
202
203
204
205
206
207
208
209
210
211
212
213
214
215
216
217
218
219
220
221
222
<!DOCTYPE html>
<html>
<head>
<meta charset="utf-8">
<title>在线购物网址</title>
</head>
<body>
<table border="1px" width="100%"> <!--让表格显示边框之后宽度为100%填充全部-->

<!--第1行 嵌套一个1*3的表格-->
<tr bgcolor="mintcream"> <!--给第1部分给个背景色-->
<td>
<table border="1px" width="100%">
<tr>
<td><img src="../img/logo2.png" ></td> <!--加图片-->
<td><img src="../img/header.png" ></td> <!--加图片-->
<td>
<a href="#" >登录</a> <!--#当做假链接 -->
<a href="#" >注册</a>
<a href="#" >购物车</a>
</td>
</tr>
</table>
</td>
</tr>

<!--第2行 放置5个超链接-->
<tr bgcolor="black"> <!--背景色设置为黑色-->
<td hegith="50px"> <!--给个高度-->
<a href="#" ><font color="white">首页</font></a> <!--#当做假链接 给字体设定白色-->
<a href="#" ><font color="white">手机数码</font></a>
<a href="#" ><font color="white">鞋靴箱包</font></a>
<a href="#" ><font color="white">电脑办公</font></a>
<a href="#" ><font color="white">香烟酒水</font></a>
</td>
</tr>

<!--第3行 放置图片-->
<tr>
<td><img src="../img/1.jpg" width="100%"></td> <!--第3行 放置图片然后设置宽度为100%填充好->
</tr>


<!--第4行 嵌套一个3*7的表格-->
<tr>
<td>
<table border="" width="100%" height="500px"> <!--让表格显示边框之后宽度为100%填充全部-->
<tr>
<td colspan="7">
<h3>最新商品<img src=../img/title2.jpg></h3>
</td>
</tr>

<tr align="center">
<td rowspan="2" width="206px" height="480px"> <!--左边大图-->
<img src="../products/hao/big01.jpg">
</td>

<td colspan="3" heigth="240px" > <!--中间大图-->
<img src="../products/hao/middle01.jpg" width="100%" hegith="100%">
</td>

<td>
<img src="../products/hao/small06.jpg" />
<p>洗衣机</p>
<p><font color="red">$998</font></p>
</td>
<td>
<img src="../products/hao/small06.jpg" />
<p>洗衣机</p>
<p><font color="red">$998</font></p>
</td>
<td>
<img src="../products/hao/small06.jpg" />
<p>洗衣机</p>
<p><font color="red">$998</font></p>
</td>
</tr>

<tr align="center">

<td>
<img src="../products/hao/small06.jpg" />
<p>洗衣机</p>
<p><font color="red">$998</font></p>
</td>
<td>
<img src="../products/hao/small06.jpg" />
<p>洗衣机</p>
<p><font color="red">$998</font></p>
</td>
<td>
<img src="../products/hao/small06.jpg" />
<p>洗衣机</p>
<p><font color="red">$998</font></p>
</td>
<td>
<img src="../products/hao/small06.jpg" />
<p>洗衣机</p>
<p><font color="red">$998</font></p>
</td>
<td>
<img src="../products/hao/small06.jpg" />
<p>洗衣机</p>
<p><font color="red">$998</font></p>
</td>
<td>
<img src="../products/hao/small06.jpg" />
<p>洗衣机</p>
<p><font color="red">$998</font></p>
</td>
</tr>
</table>
</td>
</tr>

<!--第5行 放置图片-->
<tr>
<td>
<img src="../products/hao/ad.jpg" width="100%" />
</td>
</tr>

<!--第6行 嵌套一个3*7的表格-->
<tr>
<td>
<table border="" width="100%" height="500px"> <!--让表格显示边框之后宽度为100%填充全部-->
<tr>
<td colspan="7">
<h3>最新商品<img src=../img/title2.jpg></h3>
</td>
</tr>

<tr align="center">
<td rowspan="2" width="206px" height="480px"> <!--左边大图-->
<img src="../products/hao/big01.jpg">
</td>

<td colspan="3" heigth="240px" > <!--中间大图-->
<img src="../products/hao/middle01.jpg" width="100%" hegith="100%">
</td>

<td>
<img src="../products/hao/small06.jpg" />
<p>洗衣机</p>
<p><font color="red">$998</font></p>
</td>
<td>
<img src="../products/hao/small06.jpg" />
<p>洗衣机</p>
<p><font color="red">$998</font></p>
</td>
<td>
<img src="../products/hao/small06.jpg" />
<p>洗衣机</p>
<p><font color="red">$998</font></p>
</td>
</tr>

<tr align="center">
<td>
<img src="../products/hao/small06.jpg" />
<p>洗衣机</p>
<p><font color="red">$998</font></p>
</td>
<td>
<img src="../products/hao/small06.jpg" />
<p>洗衣机</p>
<p><font color="red">$998</font></p>
</td>
<td>
<img src="../products/hao/small06.jpg" />
<p>洗衣机</p>
<p><font color="red">$998</font></p>
</td>
<td>
<img src="../products/hao/small06.jpg" />
<p>洗衣机</p>
<p><font color="red">$998</font></p>
</td>
<td>
<img src="../products/hao/small06.jpg" />
<p>洗衣机</p>
<p><font color="red">$998</font></p>
</td>
<td>
<img src="../products/hao/small06.jpg" />
<p>洗衣机</p>
<p><font color="red">$998</font></p>
</td>
</tr>
</table>
</td>
</tr>

<!--第7行 放置图片-->
<tr>
<td>
<img src="../image/footer.jpg" width="100%" />
</td>
</tr>

<!--第8行 放置超链接-->
<tr>
<td align="center">
<a href="#">关于我们</a>
<a href="#">联系我们</a>
<a href="#">招贤纳士</a>
<a href="#">法律声明</a>
<a href="#">友情链接</a>
<a href="#">支付方式</a>
<a href="#">配送方式</a>
<a href="#">服务声明</a>
<a href="#">广告声明</a>
<br/>
Copyright © 2005-2016 购物商城 版权所有
</td>
</tr>

</table>
</body>
</html>

最终样式展示:


,